Netty源码解析(二)Netty中的Channel

本文最后更新于:April 11, 2022 pm

Netty 源码分析系列:

Netty 源码解析(一): 开始

Netty 源码解析(二): Netty 的 Channel

Netty 源码解析(三): Netty 的 Future 和 Promise

Netty 源码解析(四): Netty 的 ChannelPipeline

Netty 源码解析(五): Netty 的线程池分析

Netty 源码解析(六): Channel 的 register 操作

Netty 源码解析(七): NioEventLoop 工作流程

Netty 源码解析(八): 回到 Channel 的 register 操作

Netty 源码解析(九): connect 过程和 bind 过程分析

目录

Netty 中的 Channel

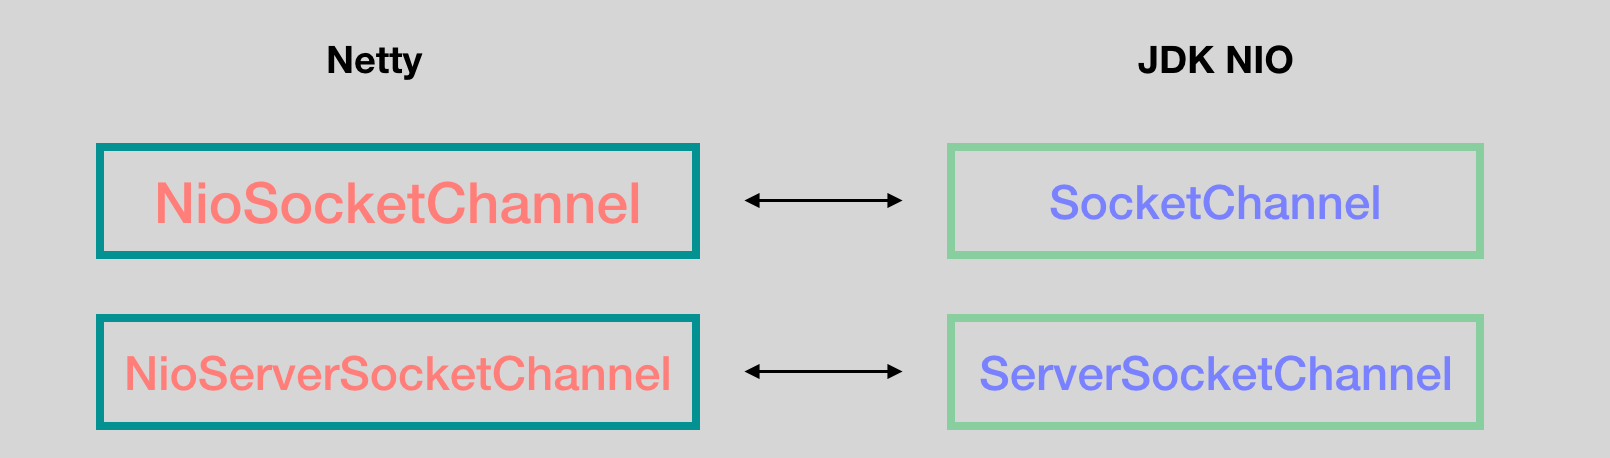
这节我们来看看 NioSocketChannel 是怎么和 JDK 底层的 SocketChannel 联系在一起的,它们是一对一的关系。NioServerSocketChannel 和 ServerSocketChannel 同理,也是一对一的关系。

3

在 Bootstrap(客户端) 和 ServerBootstrap(服务端) 的启动过程中都会调用 channel(…) 方法:

10

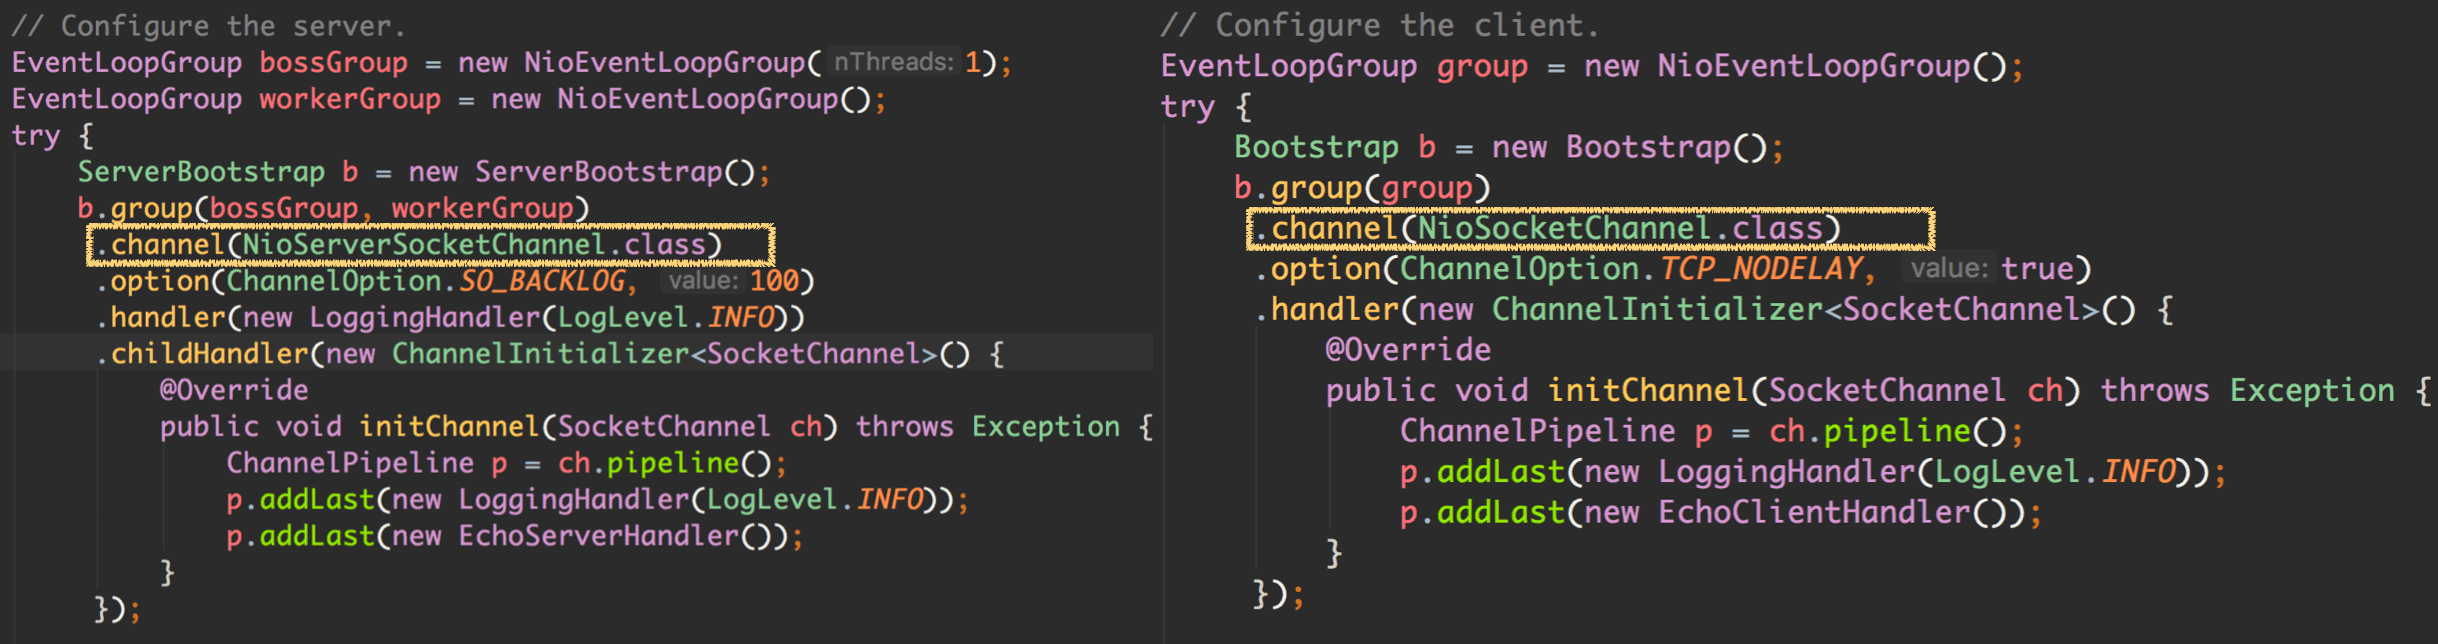
下面,我们来看 channel(…) 方法的源码:

1
2
3
4
5
6
7
// AbstractBootstrap
public B channel(Class<? extends C> channelClass) {
if (channelClass == null) {
throw new NullPointerException("channelClass");
}
return channelFactory(new ReflectiveChannelFactory<C>(channelClass));
}

我们可以看到,这个方法只是设置了 channelFactory 为 ReflectiveChannelFactory 的一个实例,然后我们看下这里的 ReflectiveChannelFactory 到底是什么:

1

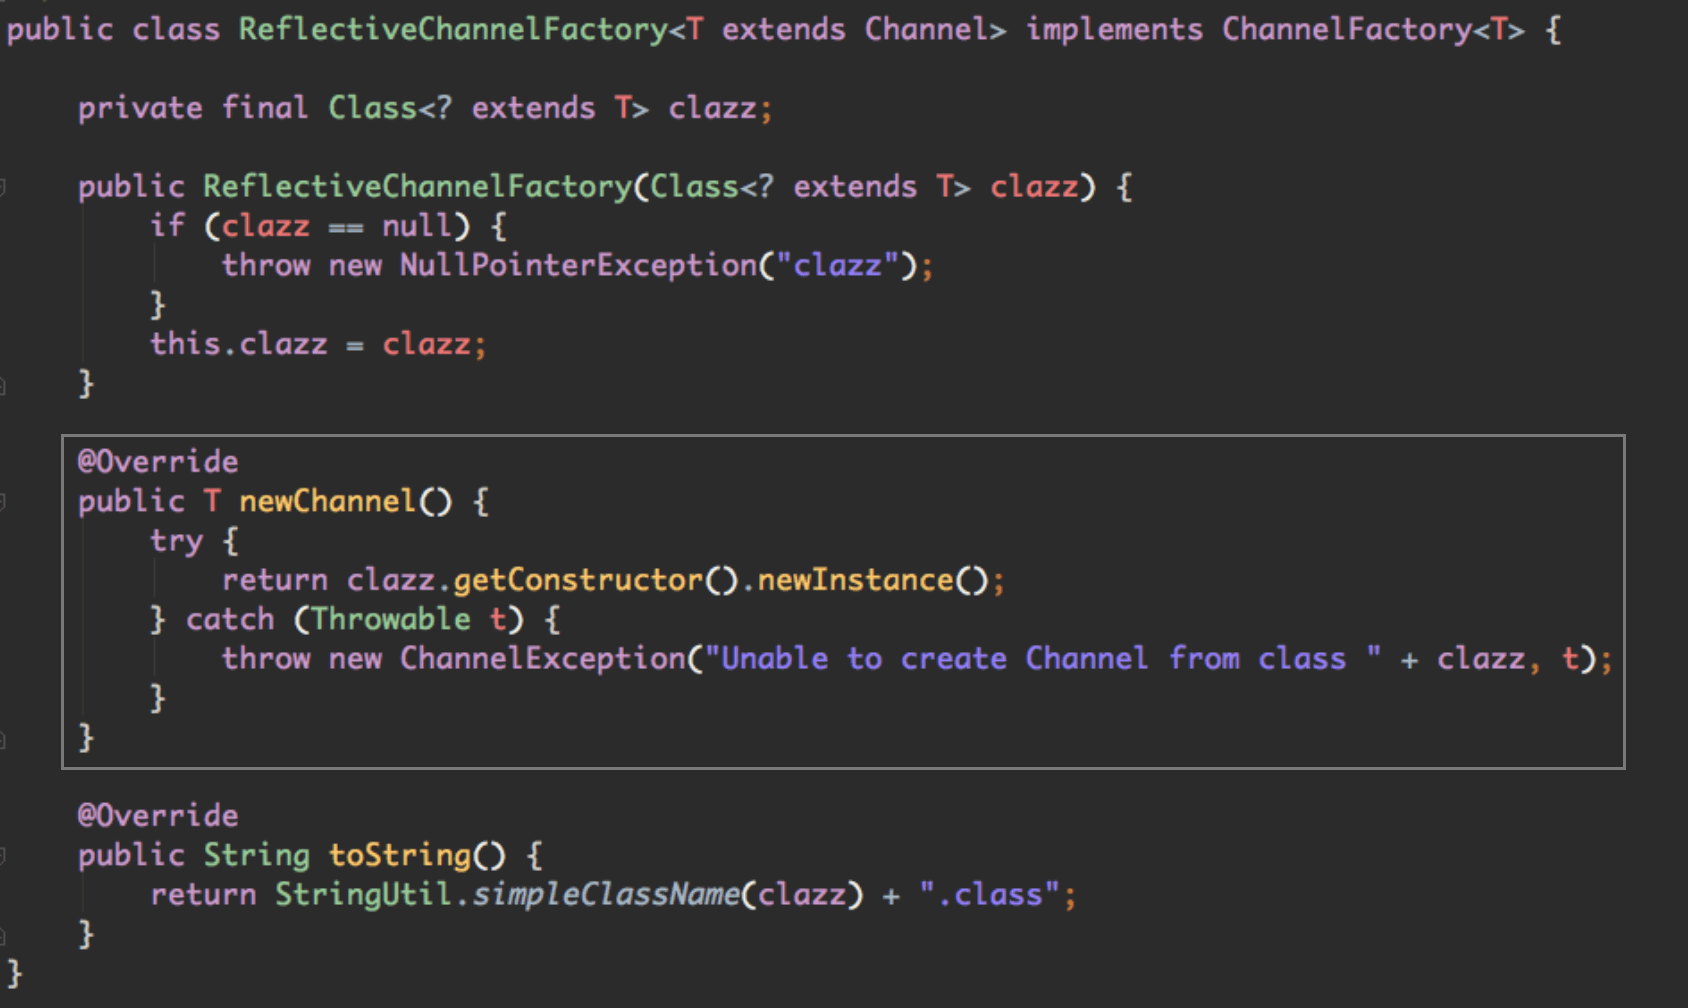
newChannel() 方法是 ChannelFactory 接口中的唯一方法,工厂模式大家都很熟悉。我们可以看到,ReflectiveChannelFactory#newChannel() 方法中使用了反射调用 Channel 的无参构造方法来创建 Channel,我们只要知道,ChannelFactory 的 newChannel() 方法什么时候会被调用就可以了。

  • 对于 NioSocketChannel,由于它充当客户端的功能,它的创建时机在 connect(…) 的时候;
  • 对于 NioServerSocketChannel 来说,它充当服务端功能,它的创建时机在绑定端口 bind(…) 的时候。

接下来,我们来简单追踪下充当客户端的 Bootstrap 中 NioSocketChannel 的创建过程,看看 NioSocketChannel 是怎么和 JDK 中的 SocketChannel 关联在一起的:

1
2
3
4
// Bootstrap
public ChannelFuture connect(String inetHost, int inetPort) {
return connect(InetSocketAddress.createUnresolved(inetHost, inetPort));
}

然后再往里看,到这个方法:

1
2
3
4
5
6
7
public ChannelFuture connect(SocketAddress remoteAddress) {
if (remoteAddress == null) {
throw new NullPointerException("remoteAddress");
// validate 只是校验一下各个参数是不是正确设置了
validate();
return doResolveAndConnect(remoteAddress, config.localAddress());
}

继续:

1
2
3
4
5
6
7
// 再往里就到这里了
private ChannelFuture doResolveAndConnect(final SocketAddress remoteAddress, final SocketAddress localAddress) {
// 我们要说的部分在这里
final ChannelFuture regFuture = initAndRegister();
final Channel channel = regFuture.channel();
......
}

然后,我们看 initAndRegister() 方法:

1
2
3
4
5
6
7
8
9
10
11
12
final ChannelFuture initAndRegister() {
Channel channel = null;
try {
// 前面我们说过,这里会进行 Channel 的实例化
channel = channelFactory.newChannel();
init(channel);
} catch (Throwable t) {
...
}
...
return regFuture;
}

我们找到了 channel = channelFactory.newChannel() 这行代码,根据前面说的,这里会调用相应 Channel 的无参构造方法。

然后我们就可以去看 NioSocketChannel 的构造方法了:

1
2
3
4
5
6
7
8
9
public NioSocketChannel() {
// SelectorProvider 实例用于创建 JDK 的 SocketChannel 实例
this(DEFAULT_SELECTOR_PROVIDER);
}

public NioSocketChannel(SelectorProvider provider) {
// 看这里,newSocket(provider) 方法会创建 JDK 的 SocketChannel
this(newSocket(provider));
}

我们可以看到,在调用 newSocket(provider) 的时候,会创建 JDK NIO 的一个 SocketChannel 实例:

1
2
3
4
5
6
7
8
private static SocketChannel newSocket(SelectorProvider provider) {
try {
// 创建 SocketChannel 实例
return provider.openSocketChannel();
} catch (IOException e) {
throw new ChannelException("Failed to open a socket.", e);
}
}

NioServerSocketChannel 同理,也非常简单,从 ServerBootstrap#bind(...) 方法一路点进去就清楚了。

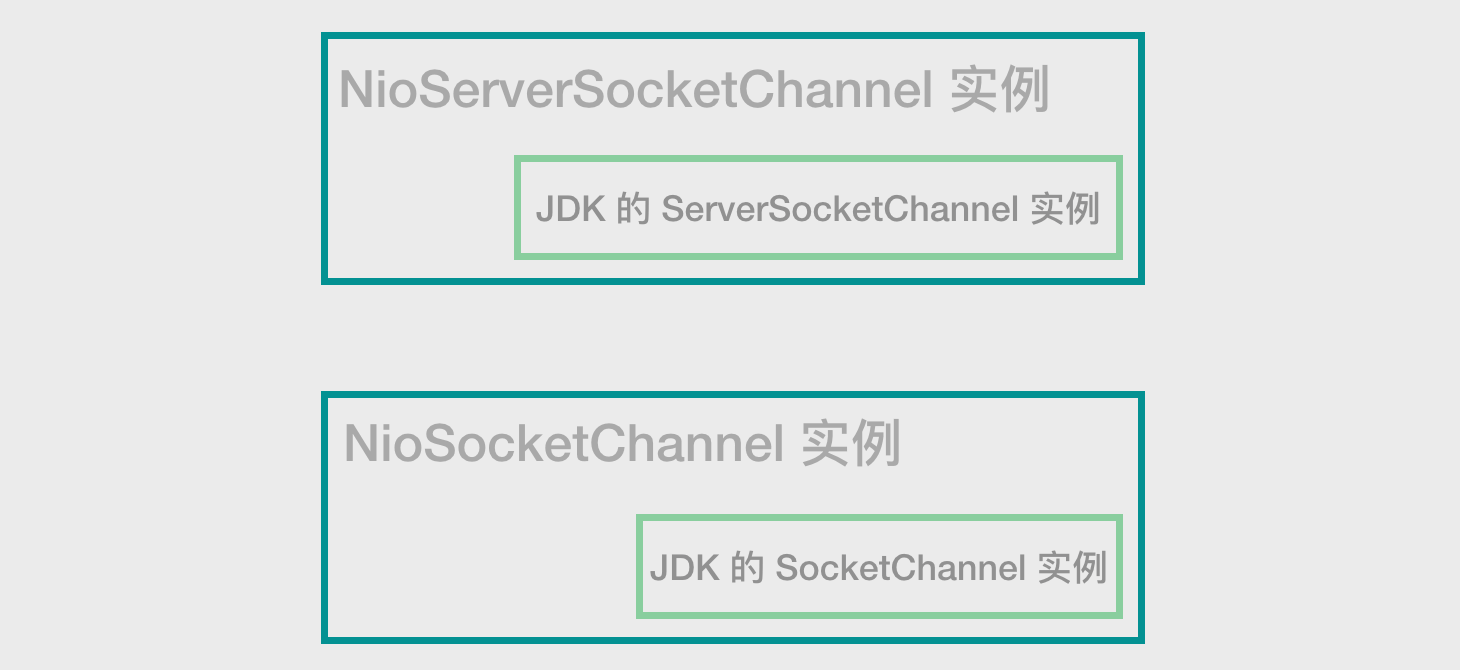
所以我们知道了,NioSocketChannel 在实例化过程中,会先实例化 JDK 底层的 SocketChannel,NioServerSocketChannel 也一样,会先实例化 ServerSocketChannel 实例:

18

说到这里,我们顺便再继续往里看一下 NioSocketChannel 的构造方法:

1
2
3
public NioSocketChannel(SelectorProvider provider) {
this(newSocket(provider));
}

刚才我们看到这里,newSocket(provider) 创建了底层的 SocketChannel 实例,我们继续往下看构造方法:

1
2
3
4
public NioSocketChannel(Channel parent, SocketChannel socket) {
super(parent, socket);
config = new NioSocketChannelConfig(this, socket.socket());
}

上面有两行代码,第二行代码很简单,实例化了内部的 NioSocketChannelConfig 实例,它用于保存 channel 的配置信息,这里没有我们现在需要关心的内容,直接跳过。

第一行调用父类构造器,除了设置属性外,还设置了 SocketChannel 的非阻塞模式:

1
2
3
4
5
6
7
8
9
10
11
12
13
14
15
16
17
18
protected AbstractNioByteChannel(Channel parent, SelectableChannel ch) {
// 毫无疑问,客户端关心的是 OP_READ 事件,等待读取服务端返回数据
super(parent, ch, SelectionKey.OP_READ);
}

// 然后是到这里
protected AbstractNioChannel(Channel parent, SelectableChannel ch, int readInterestOp) {
super(parent);
this.ch = ch;
// 我们看到这里只是保存了 SelectionKey.OP_READ 这个信息,在后面的时候会用到
this.readInterestOp = readInterestOp;
try {
// ******设置 channel 的非阻塞模式******
ch.configureBlocking(false);
} catch (IOException e) {
......
}
}

NioServerSocketChannel 的构造方法类似,也设置了非阻塞,然后设置服务端关心的 SelectionKey.OP_ACCEPT 事件:

1
2
3
4
5
public NioServerSocketChannel(ServerSocketChannel channel) {
// 对于服务端来说,关心的是 SelectionKey.OP_ACCEPT 事件,等待客户端连接
super(null, channel, SelectionKey.OP_ACCEPT);
config = new NioServerSocketChannelConfig(this, javaChannel().socket());
}

这节关于 Channel 的内容我们先介绍这么多,主要就是实例化了 JDK 层的 SocketChannel 或 ServerSocketChannel,然后设置了非阻塞模式,我们后面再继续深入下去。