本文最后更新于:December 3, 2021 pm
Hexo是一款基于Node.js的静态博客框架,依赖少易于安装使用,可以方便的生成静态网页托管在GitHub和Coding上,是搭建博客的首选框架。大家可以进入hexo官网进行详细查看,因为Hexo的创建者是台湾人,对中文的支持很友好,可以选择中文进行查看。
Hexo搭建步骤
1.安装Git
Git是目前世界上最先进的分布式版本控制系统,可以有效、高速的处理从很小到非常大的项目版本管理。也就是用来管理你的hexo博客文章,上传到GitHub的工具。Git非常强大.
windows:到git官网上下载,Download git,下载后会有一个Git Bash的命令行工具,以后就用这个工具来使用git。
linux:对linux来说实在是太简单了,因为最早的git就是在linux上编写的,只需要一行代码
安装好后,用 git –version 来查看一下版本
2.安装Node.js
windows:nodejs选择LTS版本就行了。
linux:
| sudo apt-get install nodejs
sudo apt-get install npm
|
安装完后,检查有没有安装成功
3.安装Hexo
可以先创建一个文件夹blog,然后cd到这个文件夹下(或者在这个文件夹下直接 右键 -> git bash 打开 )。
然后输入命令
可以用 hexo -v 查看一下版本
3.1初始化hexo
| hexo init myblog //myblog为文件夹名字,可以任意取
cd myblog //进入这个myblog文件夹
npm install
|
之后,我文件夹中就会多一些文件夹
- node_modules: 依赖包
- public:存放生成的页面
- scaffolds:生成文章的一些模板
- source:用来存放你的文章
- themes:主题
- _config.yml: 博客的配置文件
然后再输入命令
| hexo g
hexo server //hexo s
|
再在浏览器输入 localhost:4000 就可以在本地看到你生成的博客了。此时不能关闭 git ,否则将无法在本地看见。也可以在 git 中输入 ctrl+c 来停止本地浏览。
4.GitHub创建个人仓库
正常注册即可。
登录后,在GitHub.com中看到一个New repository,
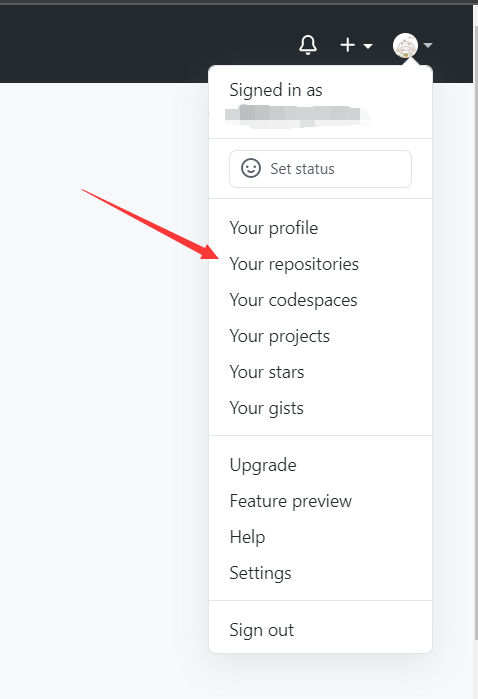
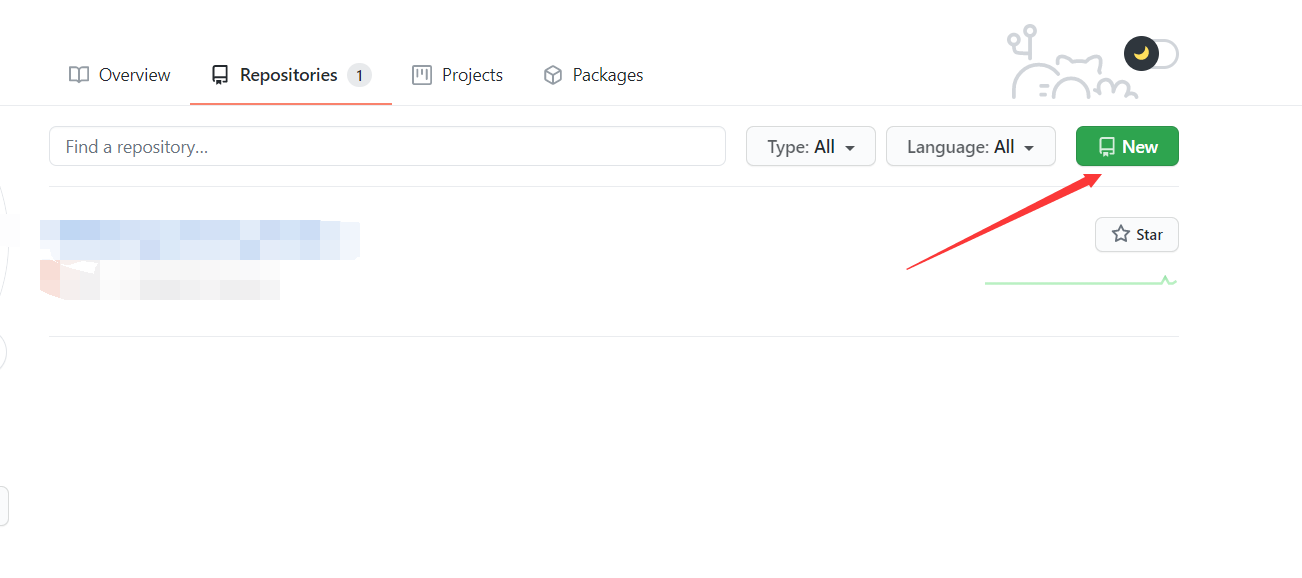
点击 new 新建一个,
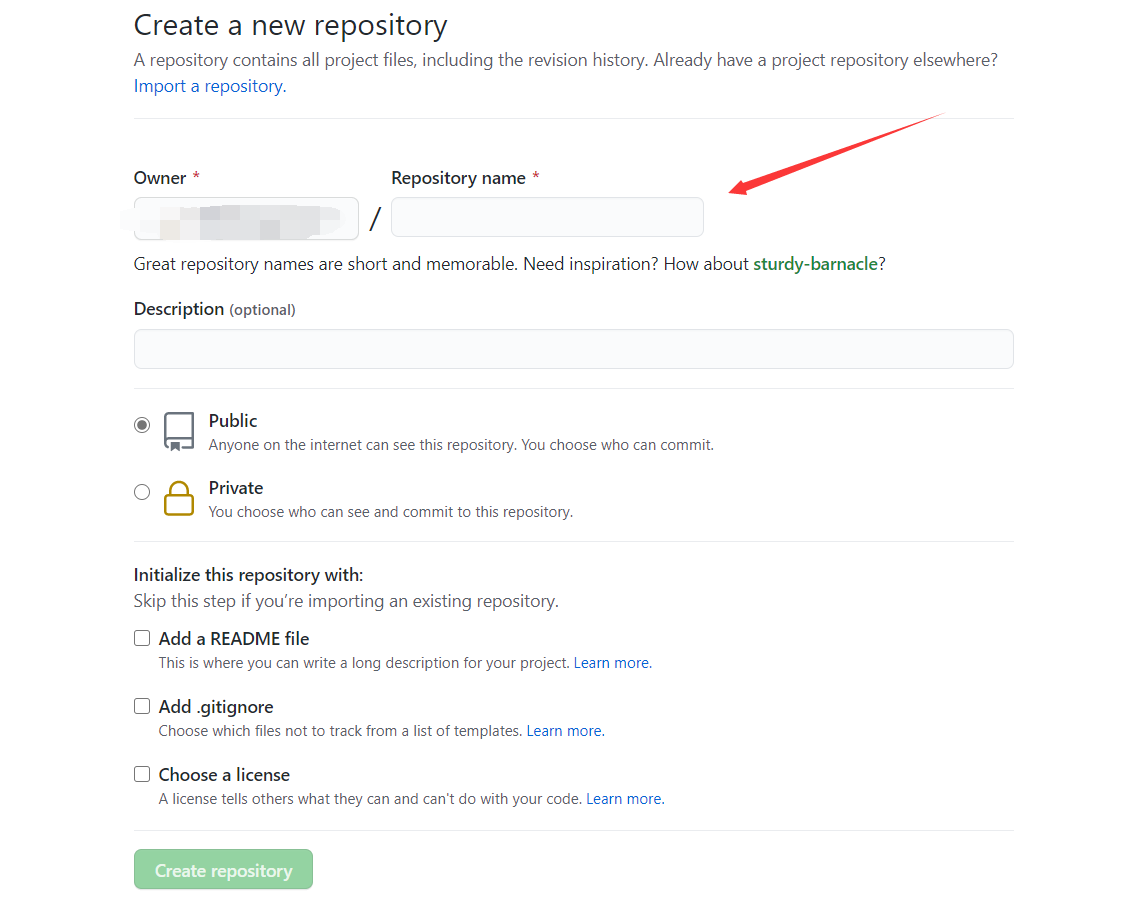
创建一个和你用户名相同的仓库,后面加.github.io,只有这样,将来要部署到GitHub page的时候,才会被识别,也就是xxxx.github.io,其中xxx就是你注册GitHub的用户名。我这里是已经建过了。填写好之后就可以 create repository 。
5.生成SSH添加到GitHub
在git bash中,输入命令,
| git config --global user.name "yourname"
git config --global user.email "youremail"
这里的yourname输入你的GitHub用户名,youremail输入你GitHub的邮箱。这样GitHub才能对应账户。
|
也可以检查一下你是否输入正确
| git config user.name
git config user.email
可以看是否是你输入的名称和邮箱。
|
然后创建SSH,一路回车
| ssh-keygen -t rsa -C "youremail"
这个时候它会告诉你已经生成了.ssh的文件夹。根据提示,在你的电脑中找到这个文件夹。
其中,id_rsa是你这台电脑的私人秘钥,不能给别人看的,id_rsa.pub是公共秘钥,可以随便给别人看。把这个公钥放在GitHub上,这样当你链接GitHub自己的账户时,它就会根据公钥匹配你的私钥,当能够相互匹配时,才能够顺利的通过git上传你的文件到GitHub上。
|
然后在GitHub的 setting 中,找到SSH keys的设置选项,点击New SSH key
把你的id_rsa.pub里面的信息复制进去即可。

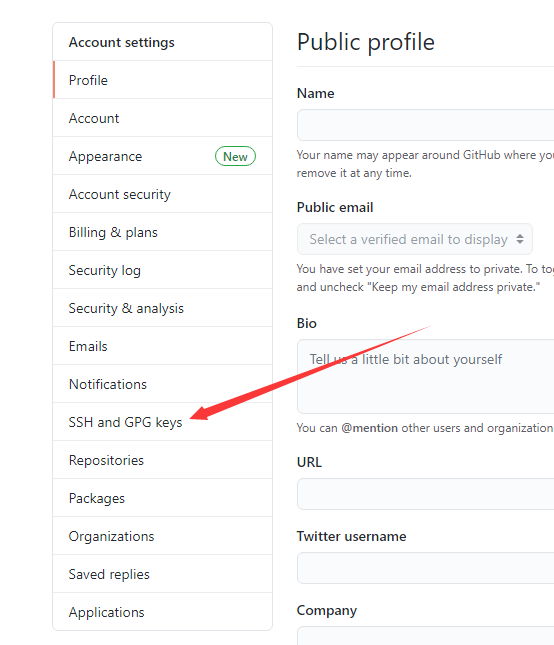
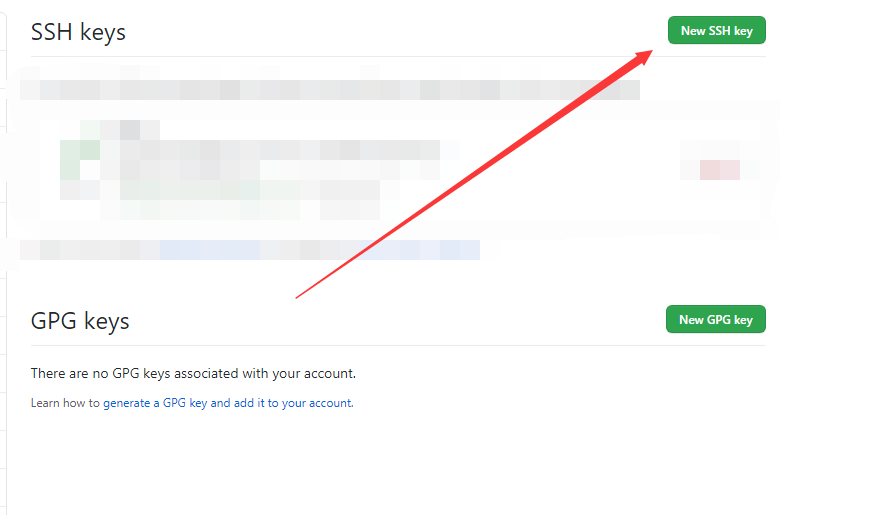
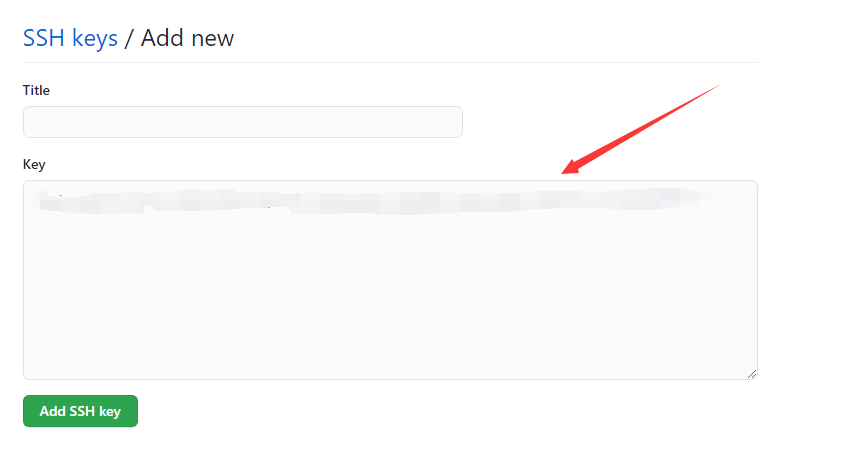
title 可以随便填。
也可以查看是否成功
6.将hexo部署到GitHub
将hexo和GitHub关联起来,也就是将hexo生成的文章部署到GitHub上,打开站点配置文件 _config.yml,翻到最后,其中,YourgithubName就是你的GitHub账户名称
修改为
| deploy:
type: git
repo: https://github.com/YourgithubName/YourgithubName.github.io.git
branch: master
|
这个时候需要先安装deploy-git ,也就是部署的命令,这样你才能用命令部署到GitHub。
| npm install hexo-deployer-git --save
|
然后
| hexo clean
hexo generate
hexo deploy
|
注意
hexo d 时可能要你输入username和password。
过一会儿就可以在http://yourname.github.io 这个网站看到你的博客了!!
以后,每当修改了内容,都可以用
去更新GitHub,也可以先用hexo clean 进行清除,再用上面两个。
7.设置个人域名
再购买了域名后,进入解析,添加解析。选择 A记录 即可。
其中,192.30.252.153 和 192.30.252.154 是GitHub的服务器地址。选择其一即可。
你也可以自己ping 自己的博客
显示出来的就是GitHub服务器的地址。也可以直接用给出的,都是一样的效果。
在域名解析完成后,再登录GitHub,进入之前创建的仓库,
在你的仓库中创建一个名为CNAME文件,不要www或者hppt之类的。直接写上你的域名。如:abcdef.com
过不了多久,再打开你的浏览器,输入你自己的域名,就可以看到搭建的网站啦!
Hexo配置
在文件根目录下的_config.yml,就是整个hexo框架的配置文件了。
1.更换主题
持续更新中······
Mac安装(自记)
1
2
3
4
5
6
7
8
9
10
11
12
13
14
15
16
17
18
|
/bin/zsh -c "$(curl -fsSL https://gitee.com/cunkai/HomebrewCN/raw/master/Homebrew.sh)"
brew install git
git config --global user.name "yourname"
git config --global user.email "youremail"
ssh-keygen -t rsa -C "youremail"
git config --global --list
brew install nodejs
brew install npm
npm install -g hexo-cli
sudo chown -R `whoami` /usr/local/lib/node_modules
|
权限问题报错:
1
2
3
4
5
6
7
8
9
10
11
12
13
14
15
16
17
18
19
20
21
22
23
24
25
26
27
28
29
30
31
| ➜ blog git:(master) ✗ npm install hexo-generator-feed --save
> fsevents@1.2.13 install /Users/dragonone/ToTheFor/blog/node_modules/hexo-helper-live2d/node_modules/fsevents
> node install.js
No receipt for 'com.apple.pkg.CLTools_Executables' found at '/'.
No receipt for 'com.apple.pkg.DeveloperToolsCLILeo' found at '/'.
No receipt for 'com.apple.pkg.DeveloperToolsCLI' found at '/'.
gyp: No Xcode or CLT version detected!
gyp ERR! configure error
gyp ERR! stack Error: `gyp` failed with exit code: 1
gyp ERR! stack at ChildProcess.onCpExit (/usr/local/lib/node_modules/npm/node_modules/node-gyp/lib/configure.js:351:16)
gyp ERR! stack at ChildProcess.emit (events.js:375:28)
gyp ERR! stack at Process.ChildProcess._handle.onexit (internal/child_process.js:277:12)
gyp ERR! System Darwin 20.6.0
gyp ERR! command "/usr/local/bin/node" "/usr/local/lib/node_modules/npm/node_modules/node-gyp/bin/node-gyp.js" "rebuild"
gyp ERR! cwd /Users/dragonone/ToTheFor/blog/node_modules/hexo-helper-live2d/node_modules/fsevents
gyp ERR! node -v v14.17.3
gyp ERR! node-gyp -v v5.1.0
gyp ERR! not ok
+ hexo-generator-feed@3.0.0
added 6 packages from 14 contributors and audited 647 packages in 17.903s
19 packages are looking for funding
run `npm fund` for details
found 37 vulnerabilities (2 low, 18 moderate, 17 high)
run `npm audit fix` to fix them, or `npm audit` for details
|
